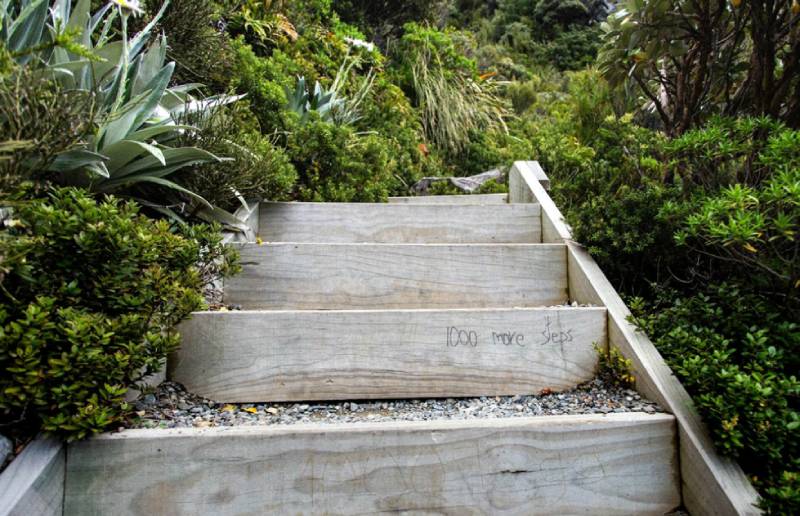
Turning a difficult incline into a navigable, beautifully structured backyard feature is one of the most rewarding landscaping projects a UK homeowner can tackle. From initial slope preparation to long-term weatherproofing, this practical guide walks you through creating a rock-solid network of steps and walkways designed to handle heavy rainfall, enhance your outdoor flow, and look entirely at home in the landscape for decades.
The Structural Challenge of Sloped British Landscapes
Sloped gardens present both an architectural opportunity and a civil engineering challenge for British homeowners. While an elevated plot offers impressive visual depth and panoramic views, navigating an inclined garden during wet weather can quickly turn hazardous. The UK’s persistent rainfall, combined with widespread heavy clay soils like London Clay or Weald Clay, creates unstable surface conditions. Clay soil holds onto moisture, expanding in winter and shrinking during summer, which generates continuous lateral movement along any inclined ground.
Without structured terracing and engineered access routes, sloped lawns suffer from severe topsoil erosion, water pooling, and muddy footpaths. Constructing steps and pathways using heavy-duty timber sleepers solves these issues simultaneously. Sleepers act as mini retaining walls that hold back soil, establish stable horizontal treads, and create defined, visually striking walkways. However, success depends entirely on choosing the right timber, calculating ergonomic step ratios, and mastering underground drainage.
Material Selection: The Unmatched Power of Hardwood Sleepers
While pressure-treated softwood sleepers are common in garden centers, building steps and pathways on a sloped plot requires superior structural density. This is where hardwood sleepers become the ultimate choice for landscaping professionals and ambitious DIYers alike.
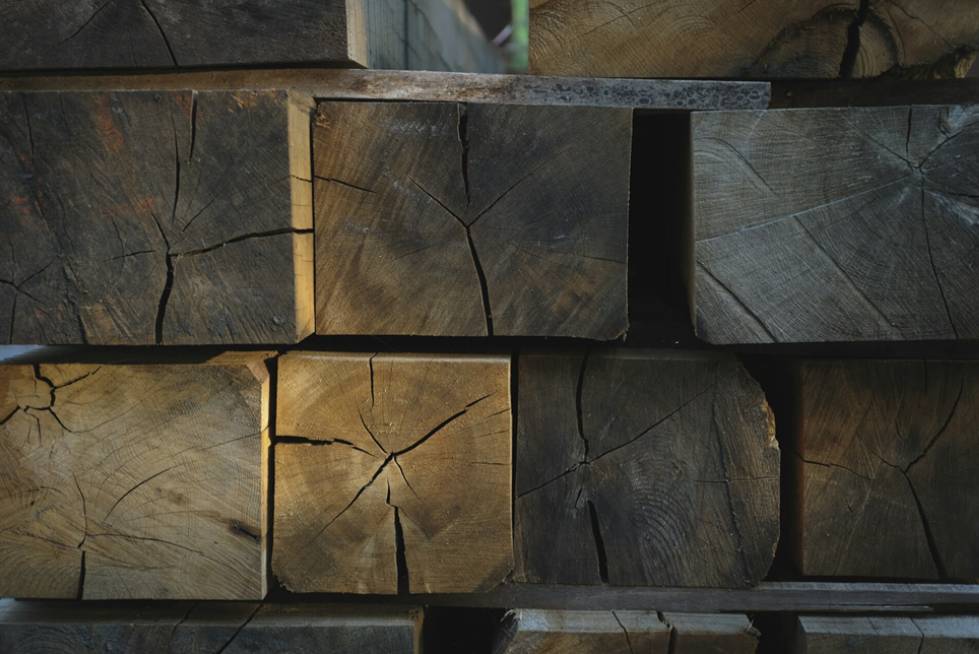
Unlike softwood sleepers made from pine or spruce, heavy-duty hardwood sleepers are cut from dense broadleaf trees-most commonly Green Oak, Seasoned European Oak, or tropical hardwoods like Azobé and Ekki.
Key Performance Advantages of Hardwood Sleepers
- Massive Natural Weight: A standard 2.4-metre hardwood sleeper weighs between 50 kg and 80 kg, compared to roughly 25 kg to 30 kg for softwood. When stacked on a slope, this mass acts as a gravity retaining system that resists the lateral hydrostatic pressure of saturated earth behind it without flexing or bowing over time.
- Chemical-Free Rot Resistance: Softwood relies on synthetic chemicals pushed into its outer shell during pressure treatment (such as Use Class 4 copper preservatives). If you cut a softwood sleeper, you compromise that chemical barrier. Hardwood sleepers possess natural densities ranging from 700 to over 1,000 kg/m³ and high concentrations of tannic acid, making them naturally resistant to fungal decay, rot, and wood-boring larvae without any chemical treatment.
- 30 to 50+ Year Lifespan: In direct ground contact, untreated hardwood significantly outlasts pressure-treated softwood, offering decades of structural integrity in damp British soil.
- Graceful Weathering: Freshly cut Green Oak starts with a warm golden-brown tone. As sunlight and rain interact with its surface, the wood cures to a silver-grey patina that complements traditional British stone, brickwork, and lush garden planting.
- Superior Wear Resistance: The high surface density withstands heavy foot traffic, garden boots, and wheelbarrows without splintering, crushing, or developing soft spots.
Step Geometry and Ergonomics for Outdoor Slopes
Building steps on a slope requires careful planning to ensure walking up and down feels natural and effortless. In indoor architecture, stair design follows strict building regulations, but outdoor landscape steps require wider treads and shallower risers to match a relaxed walking pace.
The Golden Rule of Landscape Steps
The ideal outdoor step ratio relies on a simple ergonomic formula: Two Risers + One Tread = 600mm to 660mm.
- Riser Height: A single sleeper laid flat provides an ideal riser height of 100mm to 150mm. This low rise reduces leg strain and minimizes trip hazards on wet days.
- Tread Depth: The horizontal depth from the front edge of one step to the next should measure between 350mm and 450mm for standard steps. On gentle slopes, expand the tread depth to 600mm or more to create wide, terraced landings.
- Pathway Widths: Connecting pathways should have a minimum width of 900mm for single-person access with garden tools, or 1200mm to allow two people to walk side-by-side.
- Cross-Fall Gradient: Pathways built on a slope must incorporate a subtle lateral fall of 1:40 (a 1mm drop per 40mm of width) to force rainwater to drain off the side into soil beds rather than pooling along the walkway.
Ground Preparation, Excavation, and Drainage Engineering
The most frequent cause of failure in timber step systems is standing water trapped behind the sleepers. Water adds weight to the soil, increases hydrostatic pressure against the risers, and accelerates wood decay. Proper excavation and sub-base drainage must be established before installing a single timber.
Benching the Slope Step-by-Step
- Map the Staircase: Place string lines along the center and edges of the proposed slope to calculate the total vertical rise and horizontal run. Divide the vertical rise by your target sleeper height to find the exact number of steps required.
- Excavate in Terraces: Start at the bottom of the slope and dig upward in a process called benching. Dig out a series of flat, horizontal terraces into the bank, resembling a giant set of earth stairs.
- Allow for Base Layers: Each horizontal bench must be excavated deep enough to fit a 75mm to 100mm compacted aggregate base, the sleeper riser height, and the full tread depth.
Installing a Sub-Base and Water Management System
- Geotextile Membrane: Line the entire excavated earth staircase with a heavy-duty geotextile fabric. This permeable layer stops soft clay subsoil from mixing into your crushed stone base while allowing groundwater to filter through freely.
- Compacted MOT Type 1: Lay a 75mm to 100mm layer of MOT Type 1 crushed limestone or granite over the membrane. Compact it thoroughly using a mechanical wacker plate or heavy hand tamper to create a rigid, level foundation.
- Backfill Drainage: Install a land drain or perforated drainage pipe wrapped in pea shingle directly behind each sleeper riser. This redirects trapped groundwater away from the rear of the timber and outlets it safely into a soakaway.
Step-by-Step Construction of Hardwood Sleeper Steps
Stage 1: Setting and Levelling the Base Sleeper
The bottom step carries the weight of the entire structure above it. Place your first hardwood sleeper onto the compacted MOT Type 1 base at the foot of the slope. Check it thoroughly with a long spirit level along its length and width. Use plastic shims or crushed stone underneath to adjust for minor mill variances in the wood.
Stage 2: Structural Anchoring Methods
Gravity alone cannot prevent soil movement from shifting steps over time. Secure the base sleeper deep into the subsoil using one of two methods:
- Steel Rebar Pins: Drill 18mm vertical holes through the sleeper, positioned 150mm from each end. Drive 16mm steel rebar rods through the timber and at least 500mm deep into the underlying ground using a sledgehammer.
- Concealed Steel Brackets: Fix heavy-duty galvanised L-brackets to the rear inside face of the sleeper, screwing them into 50mm x 50mm treated wooden stakes driven deep into the ground behind the riser.
Stage 3: Stacking Upper Steps and Mechanical Fixings
Lay the second hardwood sleeper onto the bench directly behind and on top of the first step. Overlap the front edge of the second sleeper over the rear edge of the lower step by at least 50mm, or butt them tightly depending on your tread design.
Connect the upper sleeper to the lower sleeper using heavy-duty, hex-head structural timber screws (such as TimberLok screws measuring 150mm to 250mm in length).
- Important Technique: Hardwood is exceptionally dense, and driving screws directly into Green Oak will snap the steel heads. You must pre-drill clearance holes using an extra-long wood drill bit and countersink the heads flush with the wood surface.
Repeat this benching, levelling, anchoring, and screwing process for each successive step as you move up the slope.
Stage 4: Infilling the Treads
Once the hardwood risers are locked into position, fill the void behind each riser to complete the walking surface:
- Line the internal tread box with geotextile fabric.
- Fill the lower 50mm with MOT Type 1 aggregate and compact it firmly.
- Top the tread with a 38mm layer of decorative surface stone, such as 10mm to 20mm angular granite chippings, self-binding gravel, or crushed slate. Avoid smooth, rounded sea pebbles, as they shift underfoot and create an unstable walking surface.
Integrating Interconnecting Pathways with Sleeper Edging
Where your steps meet flat terraces or gentle inclines, extend the design by building matching pathway runs bordered with hardwood sleepers.
Pathway Construction Steps
- Dig Edge Trenches: Excavate a shallow trench along both sides of the path route.
- Install Sleeper Curbs: Lay hardwood sleepers along the edges to act as low-profile retaining curbs. Anchor them into the ground using steel pins or wooden stakes driven along their inner faces.
- Prepare the Path Bed: Excavate the center of the path down to 125mm, lay geotextile fabric, and compact 75mm of MOT Type 1 sub-base between the sleeper borders.
- Apply the Surface Material: Spread a 35mm layer of angular gravel or self-binding pathway gravel over the compacted base.
Self-binding gravel (a blend of gravel, sand, and clay dust) works exceptionally well on mild path inclines. When compacted with a roller, it sets into a firm, semi-rigid surface that accepts wheelbarrows and footwear easily while retaining a rustic, natural finish that matches the surrounding hardwood timber.
Winter Traction and Long-Term Maintenance
In the UK’s damp winter climate, fallen leaves, algae, and standing water can create a slick surface on timber steps. Because hardwood sleepers are non-porous and dense, surface wetness takes longer to evaporate in shaded gardens.
Managing Slip Hazards
- Textured Aggregate Treads: Using gravel or self-binding aggregate for the step treads rather than solid wood panels ensures maximum grip, as feet rest primarily on stone rather than wet timber.
- Anti-Slip Inserts: For step edges where boots land directly on the hardwood riser, rout a shallow 10mm groove along the top front edge of the sleeper and insert a resin-bonded anti-slip strip or aluminium grip insert.
- Grip Coatings: Apply a clear exterior deck oil containing microscopic mineral grit along the exposed timber edges.
Routine Seasonal Maintenance
Hardwood sleepers require very little structural upkeep compared to softwood, but a small amount of seasonal care keeps them safe and visually appealing.
- Autumn Clearing: Sweep away fallen leaves and organic debris promptly each autumn. Decaying leaf litter traps moisture against the wood grain and creates a breeding ground for green algae.
- Spring Cleaning: Every spring, scrub the exposed hardwood faces with a stiff-bristled broom and an oxygenated deck cleaner or diluted outdoor biocide.
- Avoid High-Pressure Washing: Do not use high-pressure jet washers directly on hardwood at close range. Extreme water pressure strips away natural wood fibers, raising the grain and creating rough, splinter-prone patches.
By combining proper excavation, adequate sub-base compaction, effective drainage, and dense hardwood sleepers, you can transform a steep, unusable UK garden slope into a safe, elegant, and permanent feature built to endure British weather for decades.